 Documentation
Introduction
Proxynet VMS is an intelligent, secure, and cus-tomizable Visitor Management System designed for businesses, schools, healthcare facilities, cor-porate offices, and enterprises to efficiently manage visitor flows. With advanced features like self-check-in, passcode & QR verification, visitor badge printing, multi-branch support, and contrac-tor & item tracking, the VMS offers an all-in-one solution to enhance security, streamline workflows, and improve visitor experiences.
Admin
- Platform: Visitor Management System (VMS)
- Page : Sign In / Authentication
- Purpose : To allow unregistered users to create account and registered users to securely sign in to the system using email credentials or third-party services.
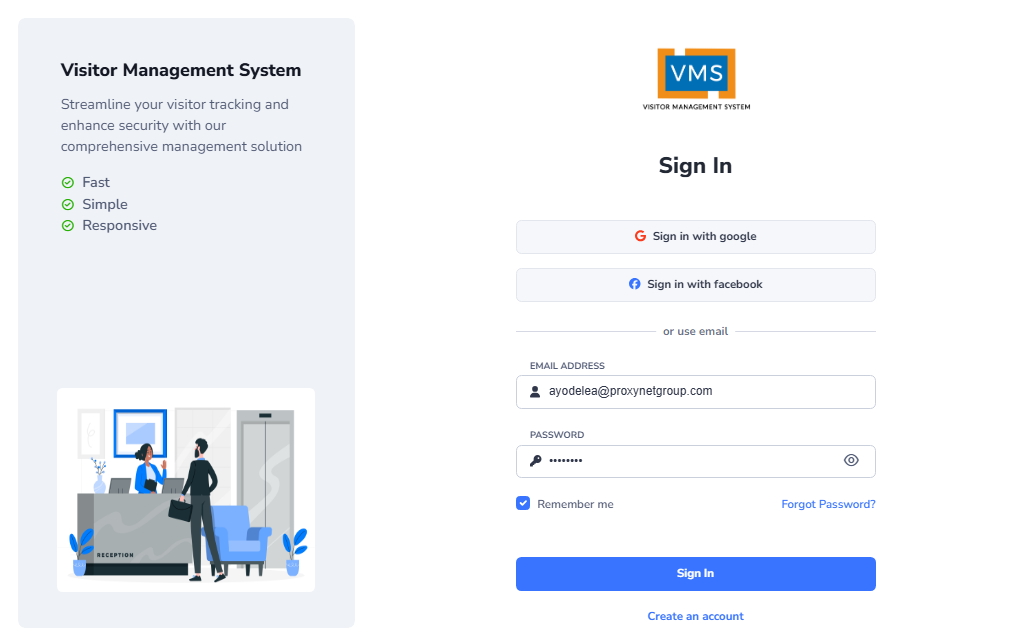
Authentication
Sign in
The Sign In process allows registered users to access their personal or admin dashboard on the system by verifying their identity using login credentials. Users can also sign in with Google or Facebook and also using your Email Address and Password
“The example below illustrates how to use your Email address and password sign in to the system.”
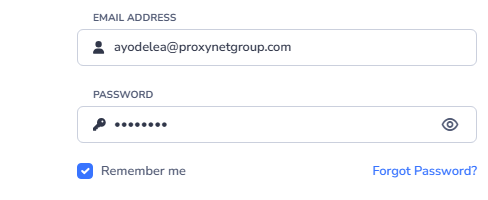
The Remember me option helps keep users logged in authomatically during future login attempts, eliminating the need to re-enter credentials each time. Forgot Password? button, this feature helps users to securly reset their password if they are unable to recall it.
Create an account
The Create an Account feature allows new users to register for access to the web application by providing required information. This process creates a user profile in the system's database and enables secure login in the future. An example of the registration interface is shown in the image below.
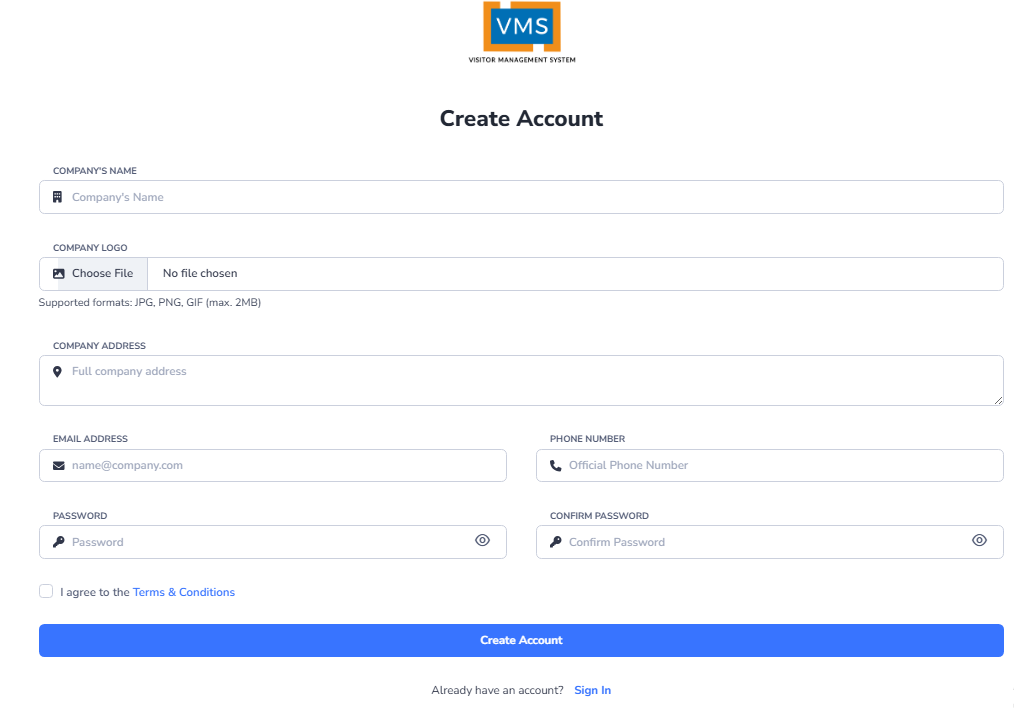
Don't forget to click on the check box to agree to the Terms & Conditions
Home Page
After successfully Creating an account and Signing in, you will be redirected to the Home page. The image below shows an example of how the Home page appears
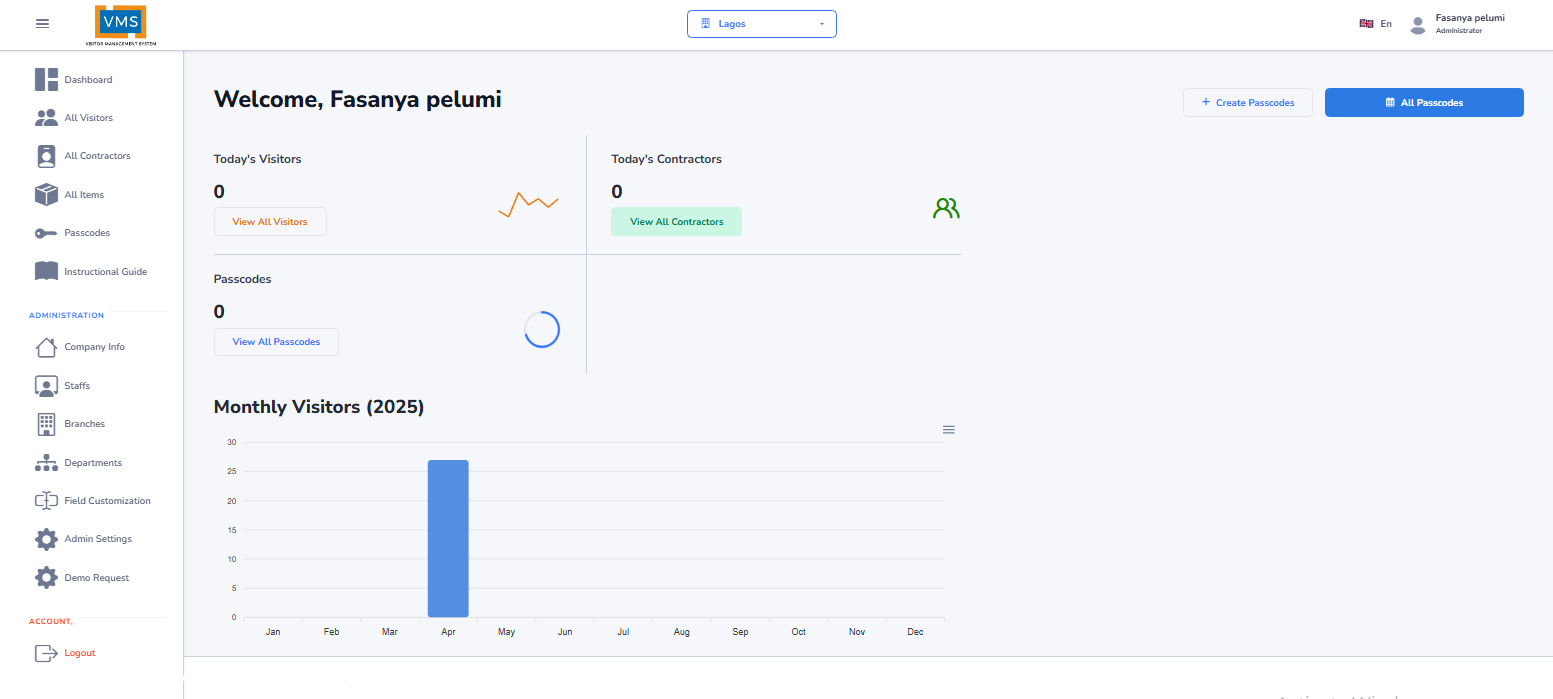
The heading of the Home page shows the Menu Button, the Logo, where you can select Branch, Switch Theme, Switch Language, and view profile. This is how the interface of the heading will look like in the image below

Dashboard
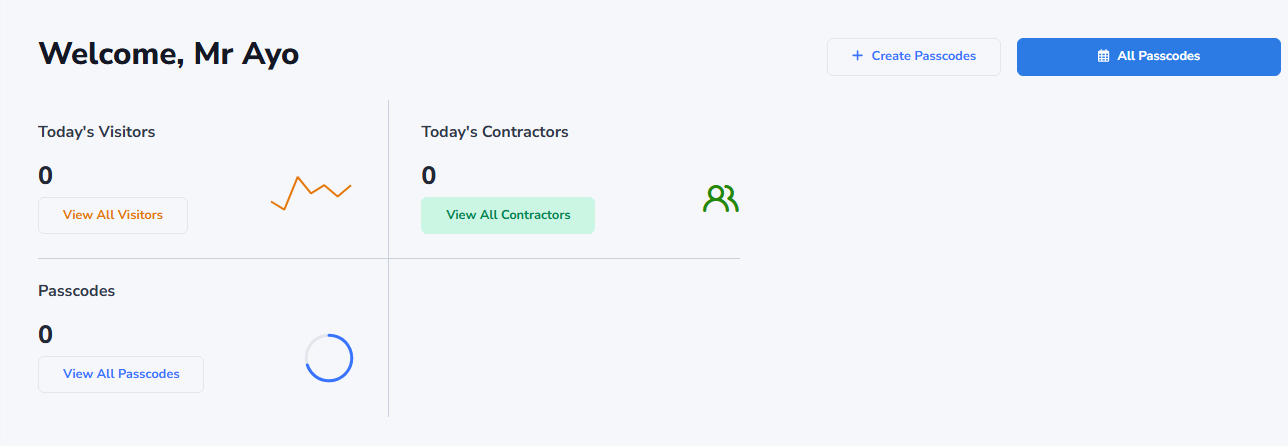
The Dashboard has many features, one of the features is that it displays a welcome message to the user. In the Dashboard you can view the total number of vistors for a particular day, Contractors, and Passcodes(allow user to create and view all available Passcodes) .This is how the interface of the dashboard will look like in the image below
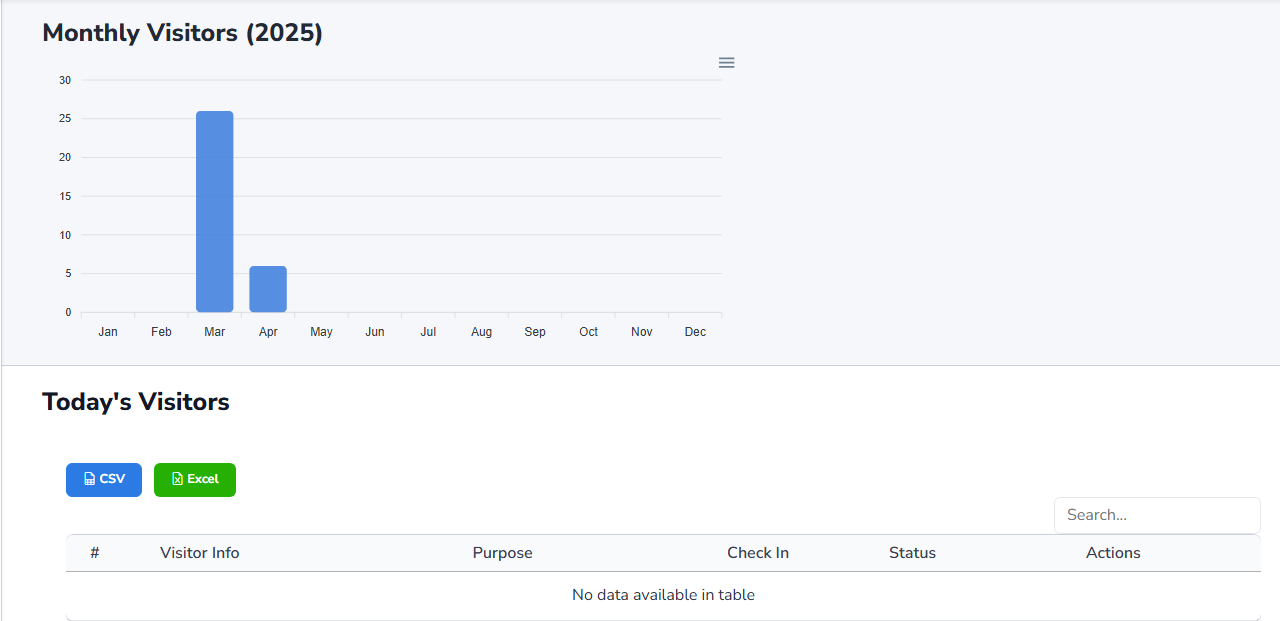
Also in the Dashboard, you can view monthly visitor statistics displayed in a bar chart, as well as detailed records of visitors for any selected day. The visitor list includes key information such as names, visit times, and contact details, Just as shown in the image below.
Note: Visitor records can be exported in two formats — CSV and Excel".
All visitors
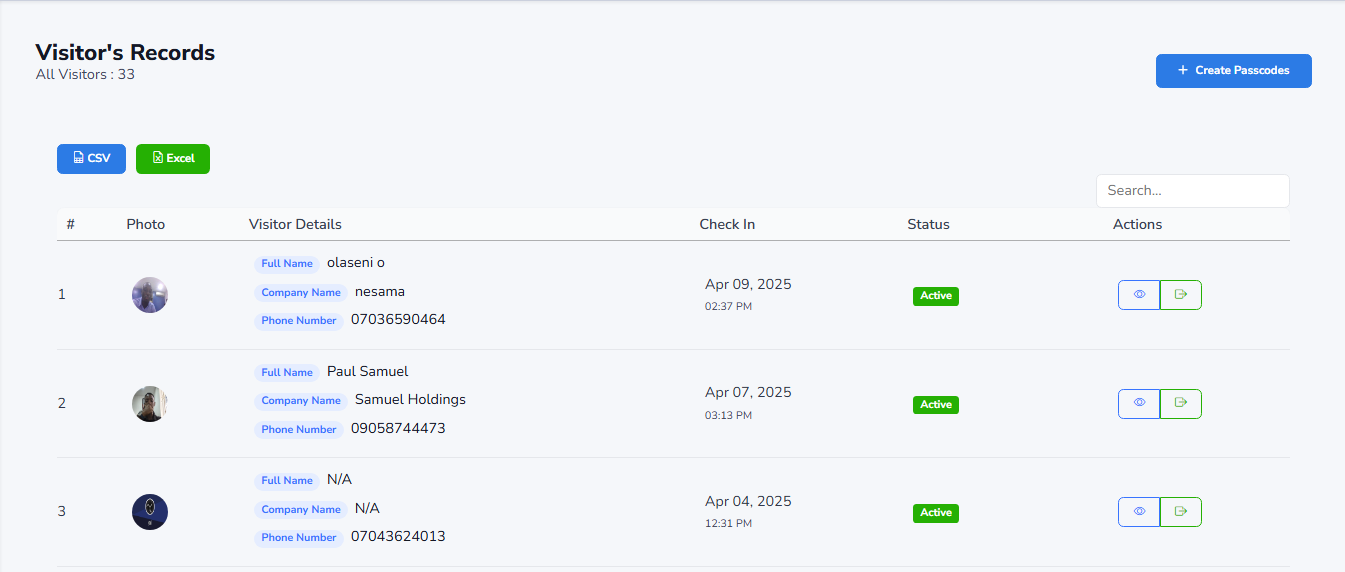
This section displays a comprehensive list of all visitor's Record. At the top of the page you can see the total number of visitors currently registered in the system . The visitor's Record contains Photo of the Visitor, Vistor Details (such as name, purpose, and contact info), Check-In Time, Status, Actions. In the Actions column, you can view Detail by clicking the Eye Icon and Checkout Visitor using the Exit button. This is how the interface of the Visitor's Record will look like in the image below
Note: You can also create passcode for visitors in this section and Visitor Records can be exported in two formats — CSV and Excel
All contractors
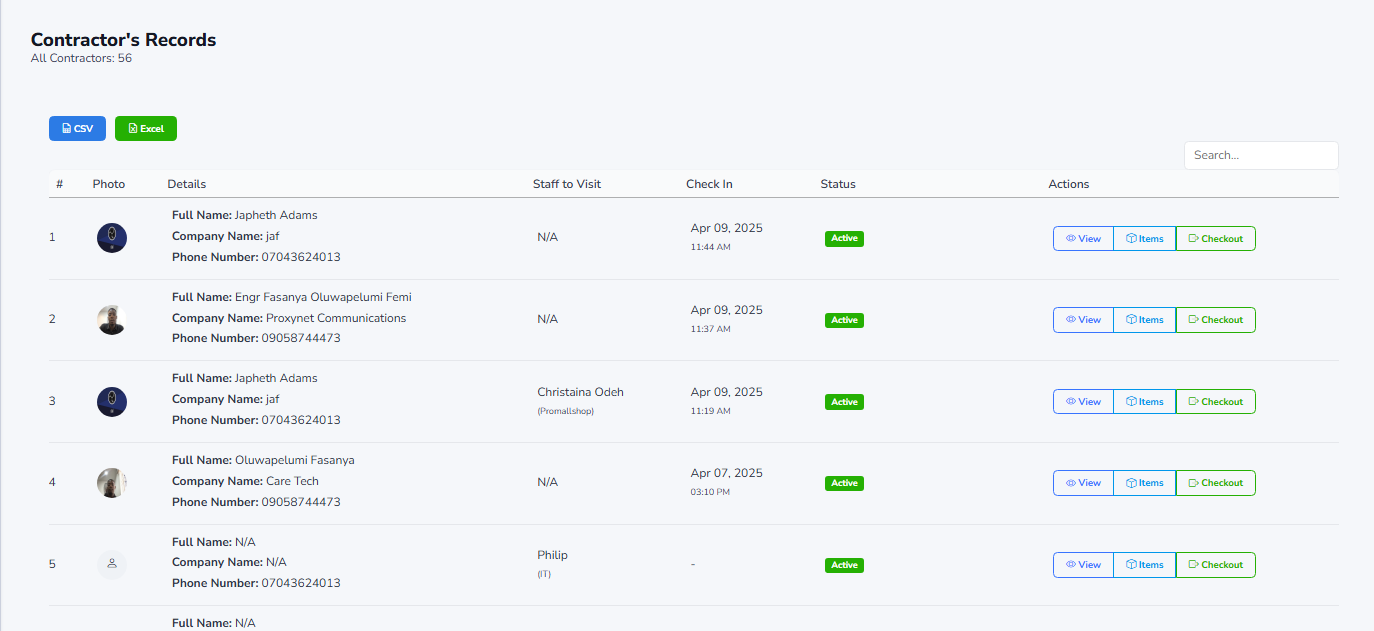
This section displays a comprehensive list of all Contractors. At the top of the page you can see the total number of all contractor's available. The Contractor Record contains Photo of the Contractor, Contractor Details, Staff to Visit, Check in, Status, and Actions. In the Actions column, you can view Detail, View Items, and Checkout Visitor. This is how the interface of the Contractor's Record will look like in the image below
Note you can also create passcode for Contractors in this section and and Contractor Record can be exported in two formats — CSV and Excel
All Items
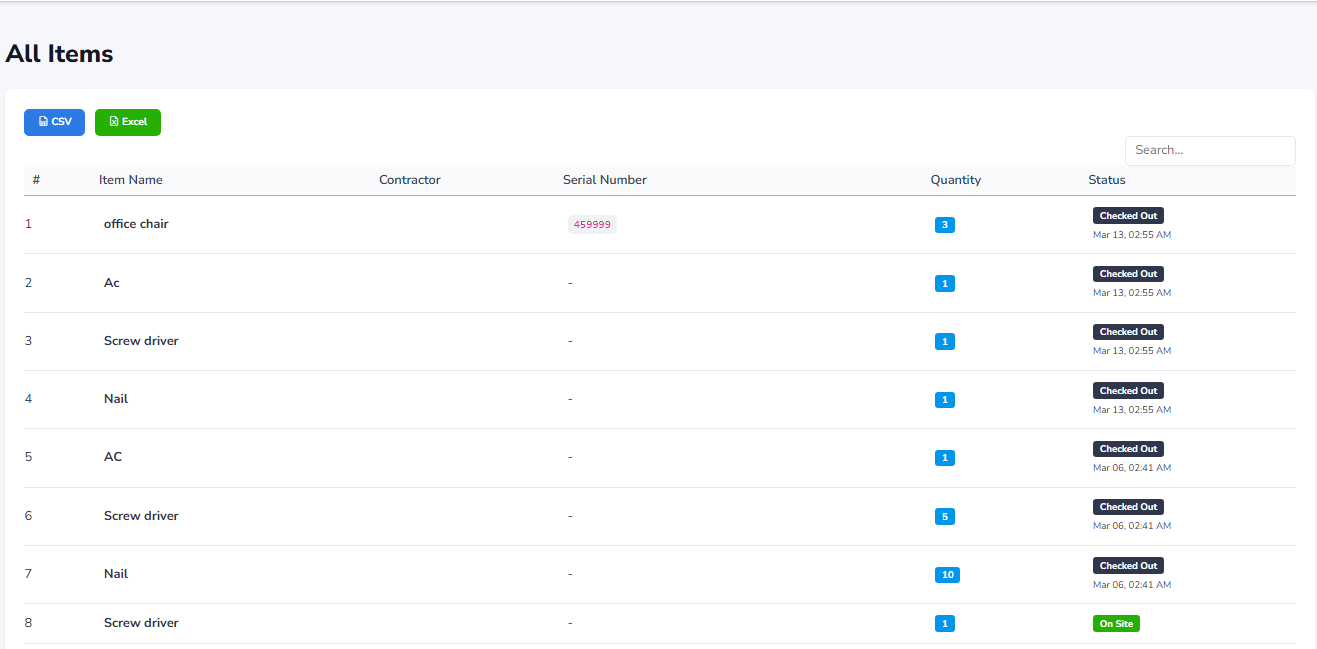
This section displays a list of all item brought by the contractors. Each entry includes the following details: Item Name, Contractor, Serial Number, Quantity, and Status. The Status shows if a user is Checked Out or On Site, This is how the interface of All Item will look like in the image below
Passcodes
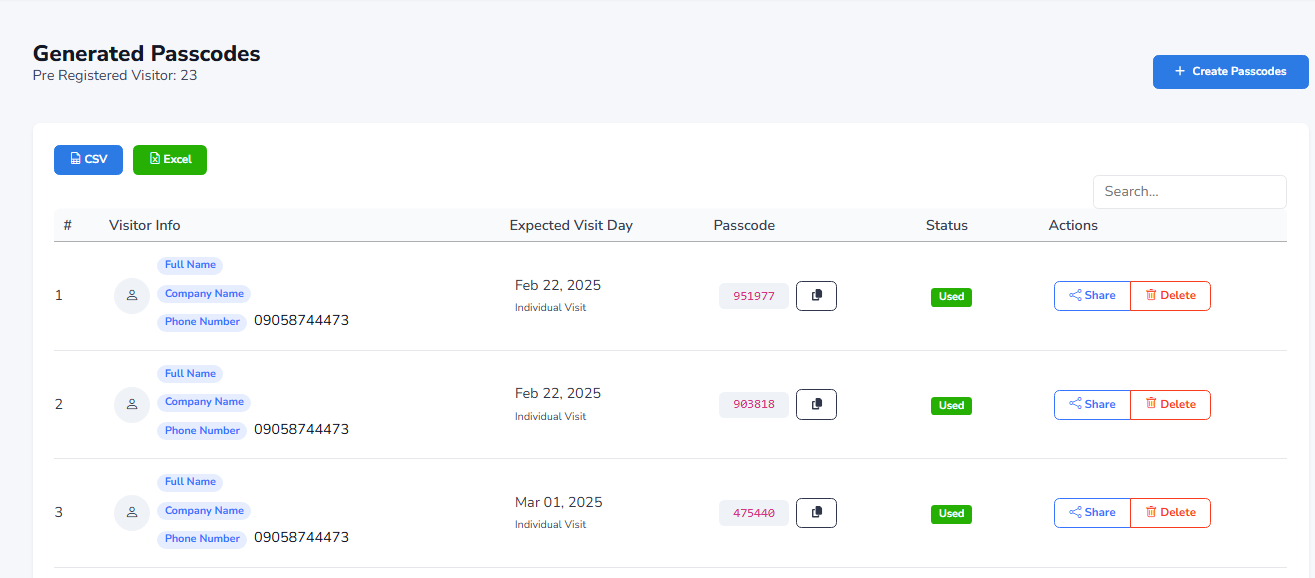
This section displays key details of visitors with registered passcodes. Each record includes the following information Visitor info, Expected Visit Day, Generated passcode(which can be copied), Status(indicates whether the passcode is used or pending) and Action(allows you to Shareor Delete a particular record.
At the top of the page, you can also view the total number of visitors with registered passcodes. This is how the Passcode interface will look like in the image below
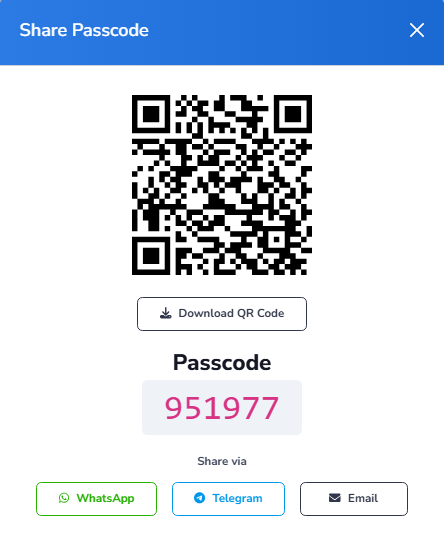
The Share Button allows you to distribute the visitor's passcode via multiple channels, including QR code, Whatsapp, Telegram, and Email. This is how the interface of the Share Passcode will look like in the image below
Company Info
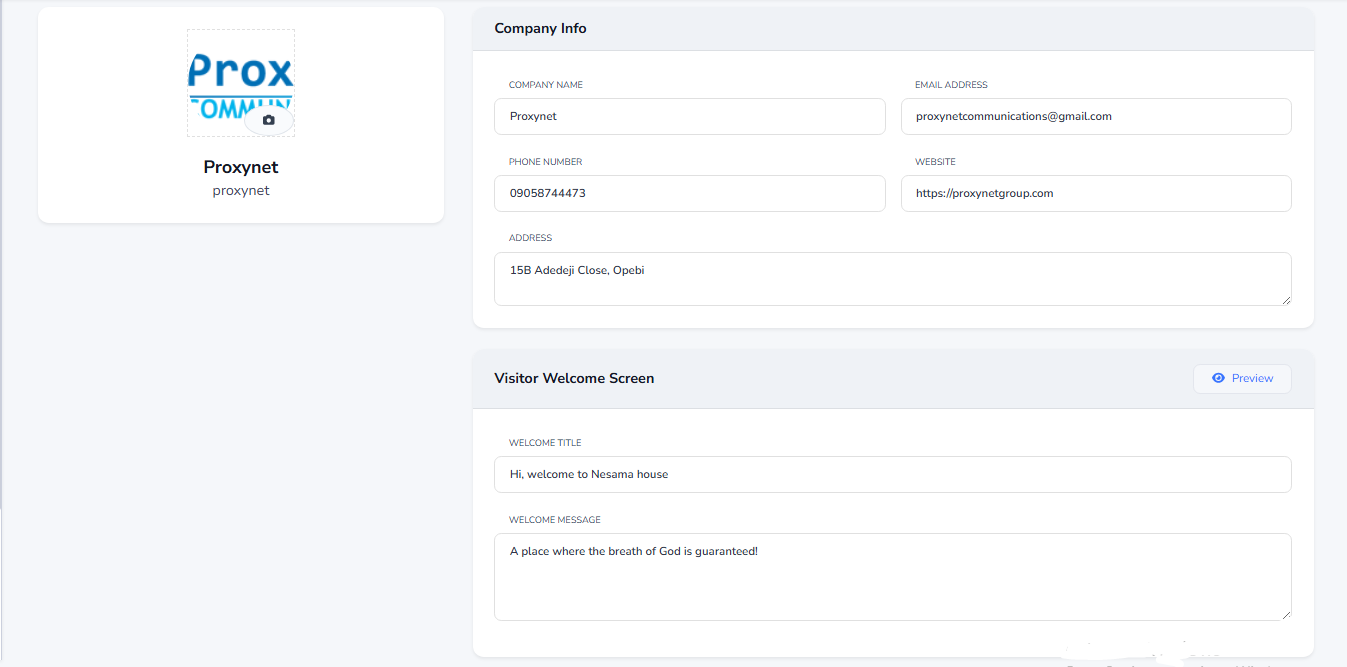
The Company info section displays the organization's registered details, such as company name, address, contact information, and logo. This is how the interface will look like in the image below
Staff
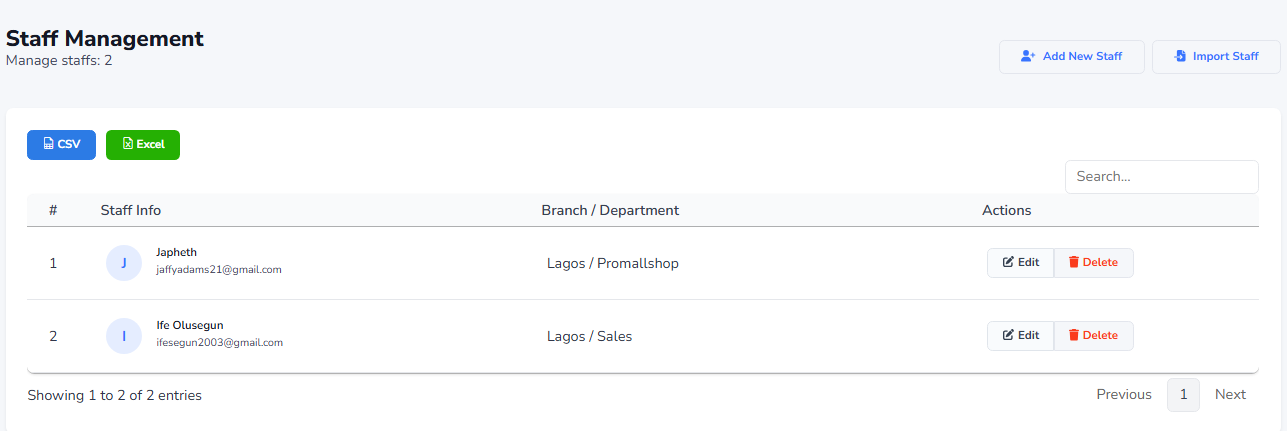
This section is used to manage all Staff record within the system. At the top of the page, you can view the total number of staff members currently registered. You also have the option to Add new Staff or Import Staff in bulk. Each staff record displays the following details: Staffs info, Branch/Department and Actions - Options to Edit/Delete the record. Staff data can be exported in either CSV or Excel format for external use or backup. This is how the Staff section will look like in the image below
Branches
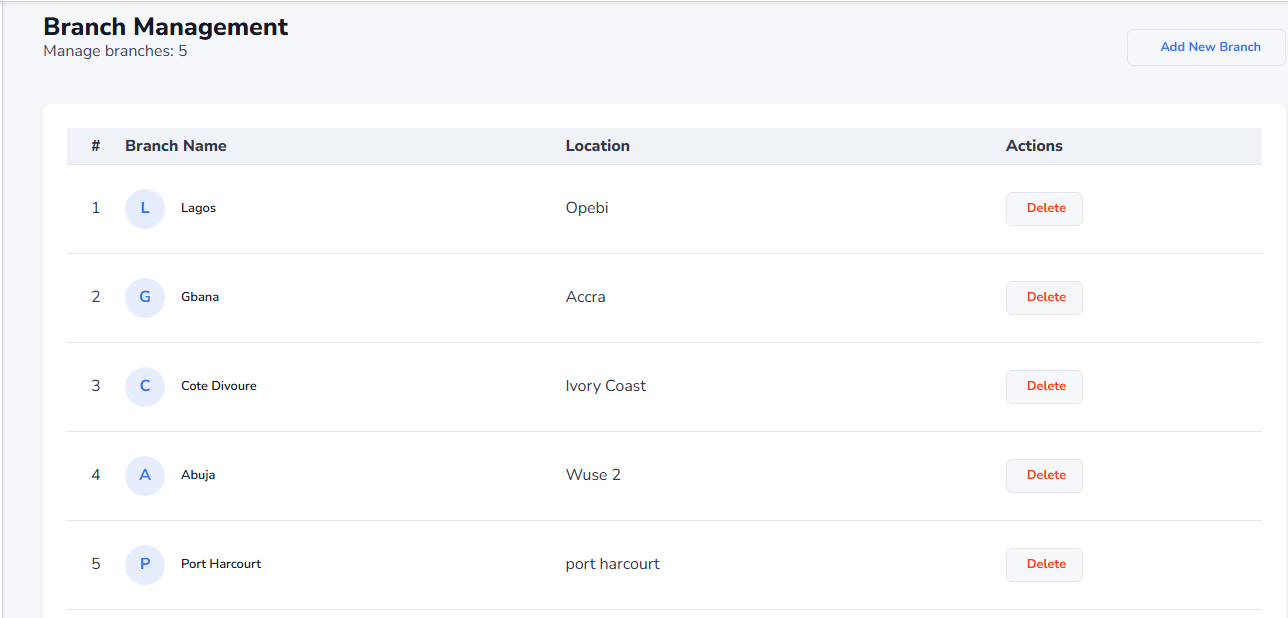
This section display all available branch registered under the company. At the top of the page, you can view the total number of branches currently available. Each branch record includes: The Branch Name, Location and Actions (allows you to Delete a particular branch). You can also add a particular branch, this is how the interface will look like in the image below
Department
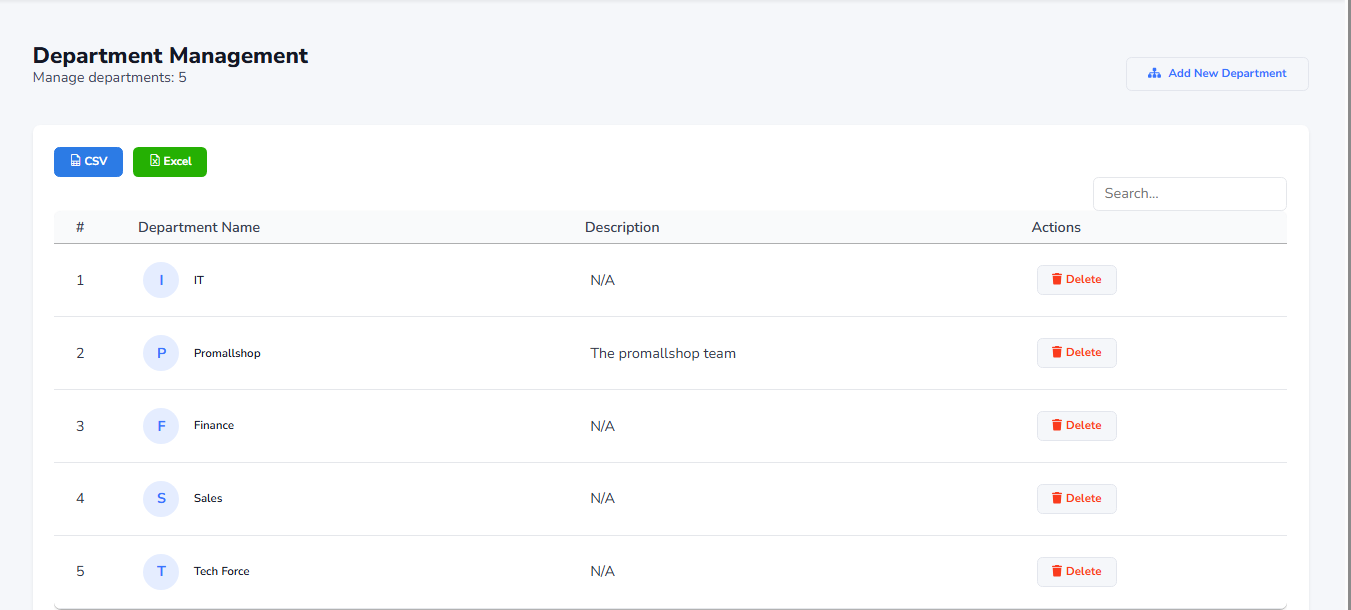
This section shows all available department under the company. At the top of the page, you can view the total number of Department currently available. Each department record include: The Department Name, Description and Actions (allow you to Delete a particular Department). You can also add a New Department, this is how the interface will look like in the image below
Field Customization
This section allows Admin to customize different type of field that will be filled by the visitors to collect information from them. All Field Customization are saved in this section and you can also Add New Field. This is how the interface will look like in the image below
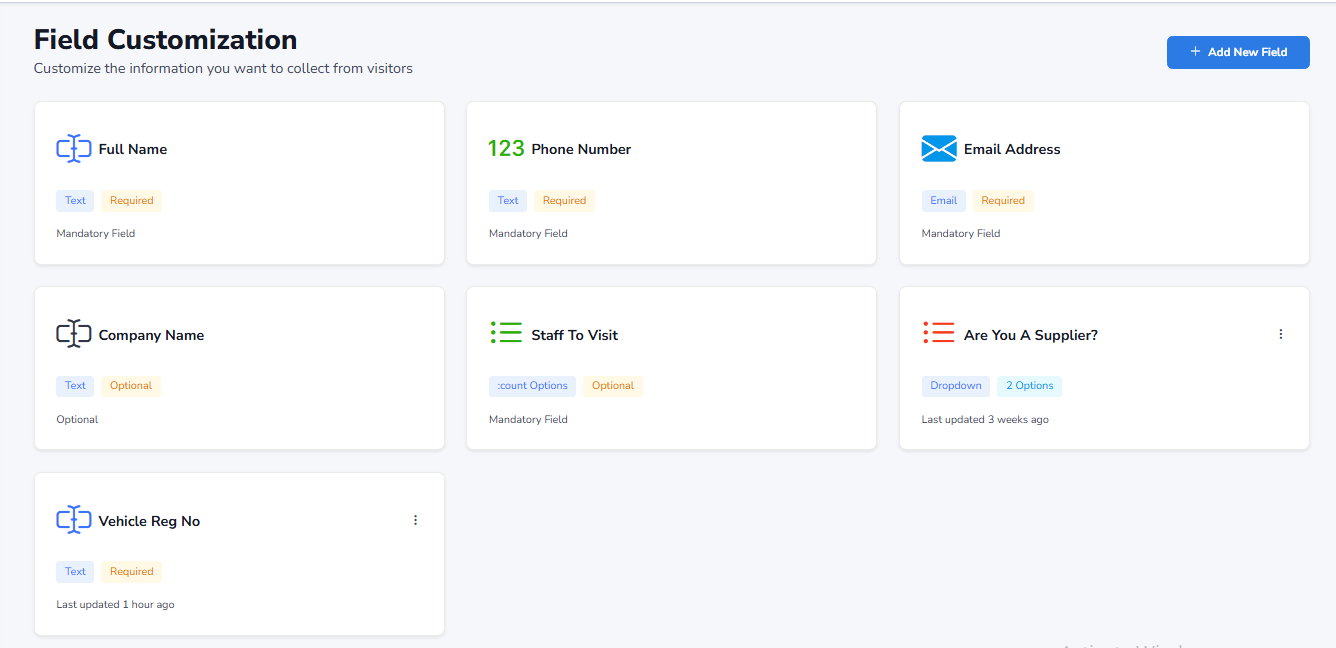
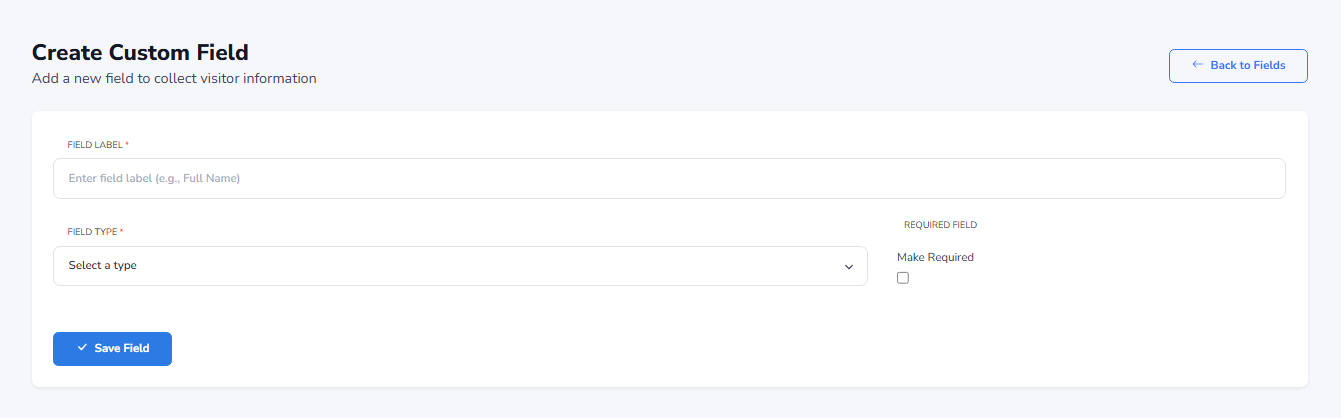
When you click on the Add New Field it will take you to where you can customize Field by entering the Field Label, Field Type and you can make Required by thicking the checkbox and then clicking the Save Field
Admin Management
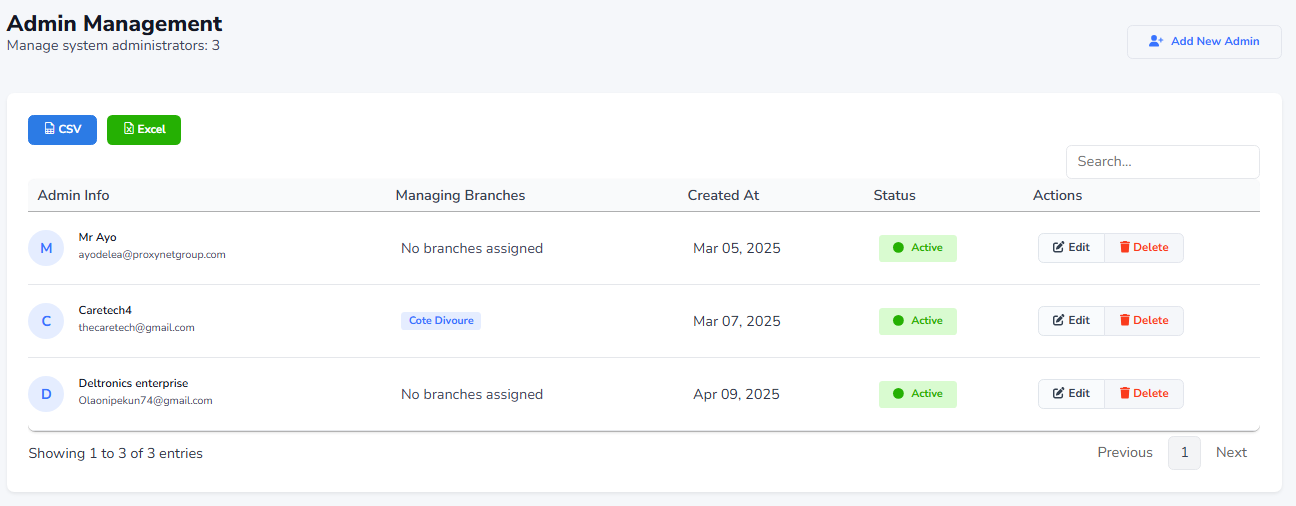
This section display all Admin with the branches they are managing. At the top of the page, you can View total numbers of Admin currently available. Each Admin record include: Admin Info, Managing Branches, Created At, Status (shows if an Admin is Active or Unactive), and Action (allows you to Edit or Delete). You can also Add New Admin, this is how the interface will look like in the image below
Demo Request
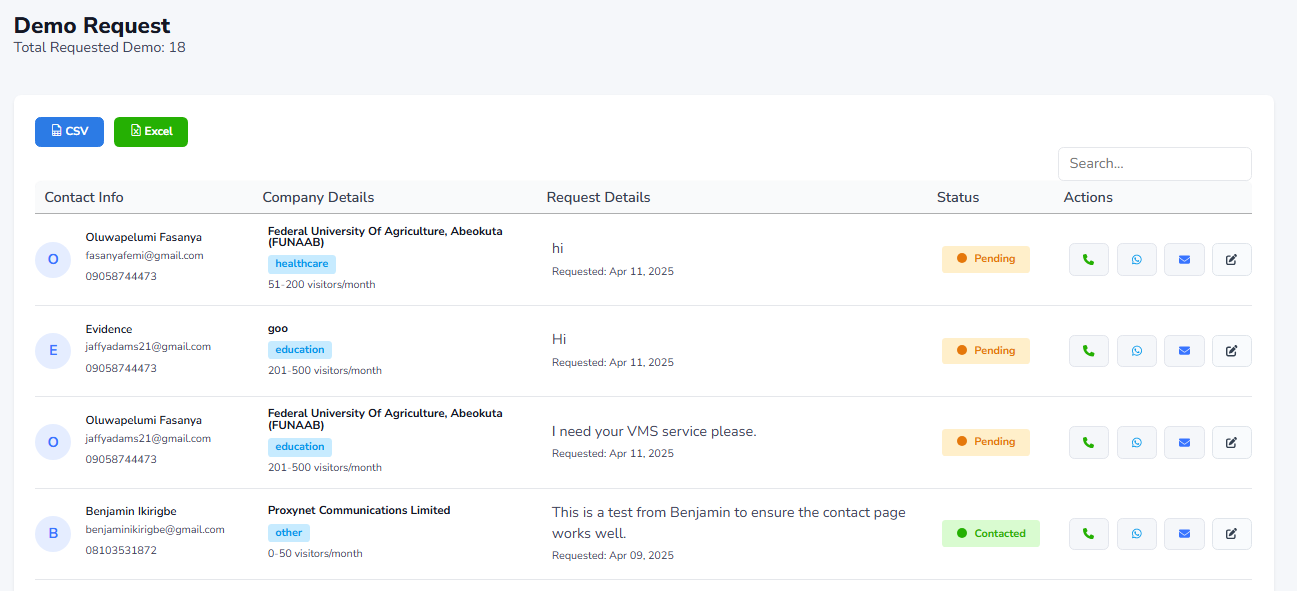
This section display all the Demo Request and at the top of the page you can see the total number of Requested Demo. Each Demo Request record include: Contact Info, Company Detail, Request Details, Status(shows if the user request is Pending or Contracted), and Action(allows you to Call, send message (Via Whatsapp andEmail) to the user who Requested for Demo and Edit a particuilar user. This is how the interface will look like in the image below
Logout
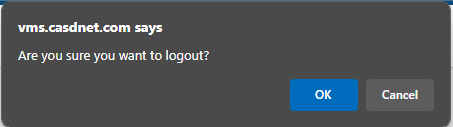
When you click on the Logout Button, it will bring out a pop-up message asking if you are sure you want to logout. This is how the interface will look like in the image below
Visitors
In the login/Sign in page provides multiple access option for both Visitor and Contractor. Users can log in directly, or if they have previously signed in they can access the system using a Passcode and Scan QR code to sign in. The interface also includes a Check-Out option for users who are leaving the premises.
At the top of the page, the current time and date are displayed, along with a language selector that allows users to switch to their preferred language. The image below shows an example of how the login/Sign in page appears
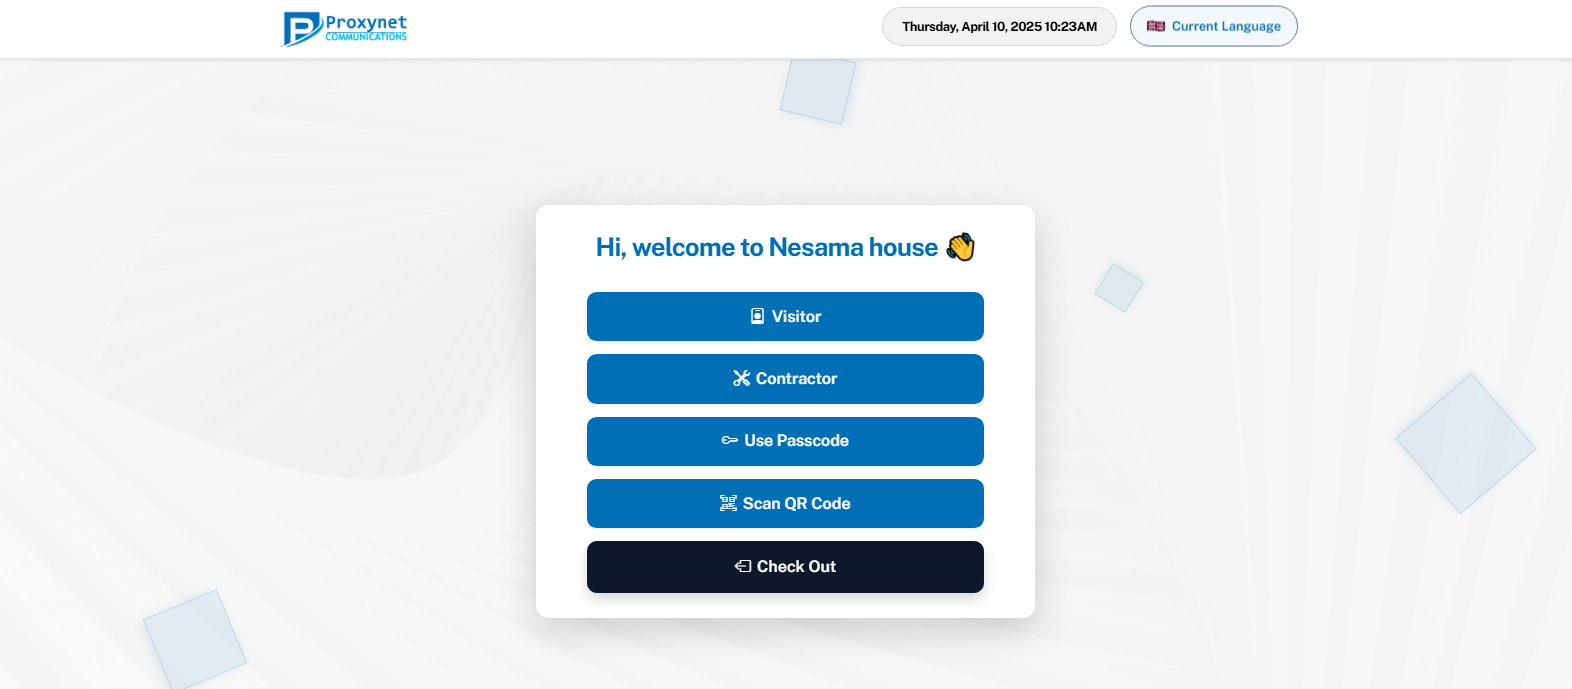
To proceed as a Visitor you will click on the Visitor button on the login/Sign in page

Once you select the have Visitor option on the Login/Sign-in page, the system will direct you to the Visitor's Registration page where you can enter your details to complete the check-in process. The image below displays the layout of this page.
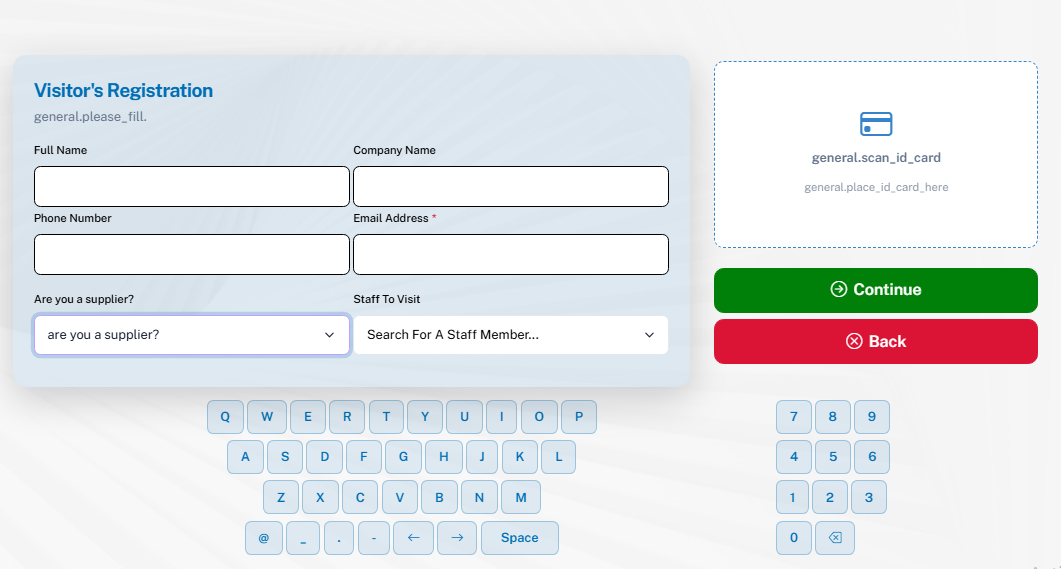
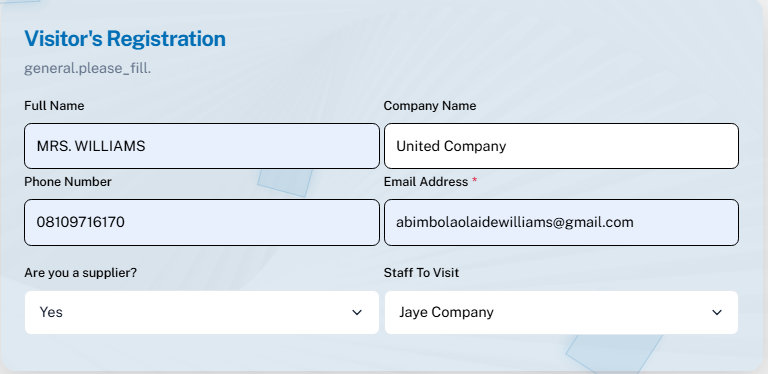
The Visitor's Registration section allows visitor's to register the following details: Full name, Company Name, Phone Number, and Email Address. You can also state if you are a supplier or not and choose the staff you want to visit. This is an example of a filled visitor register in the image below
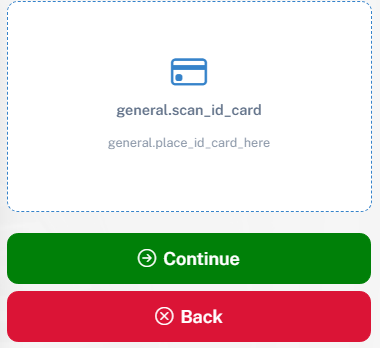
The final step of the registeration is to scan your ID Card by placing your ID Card on the screen. This is how the ID Card section will look like in the image below
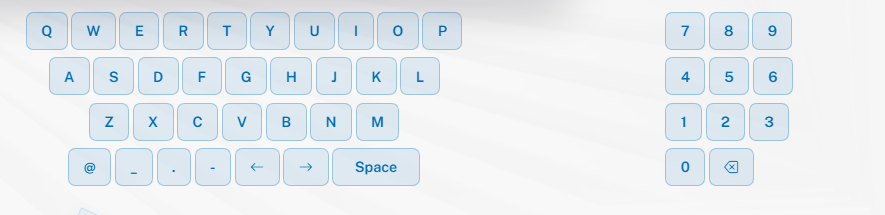
To ensure accessibility across all device types, an on-screen keyboard is provided for users whose devices may not support physical input. The example below shows the layout of the on-screen keyboard as it appears during registration
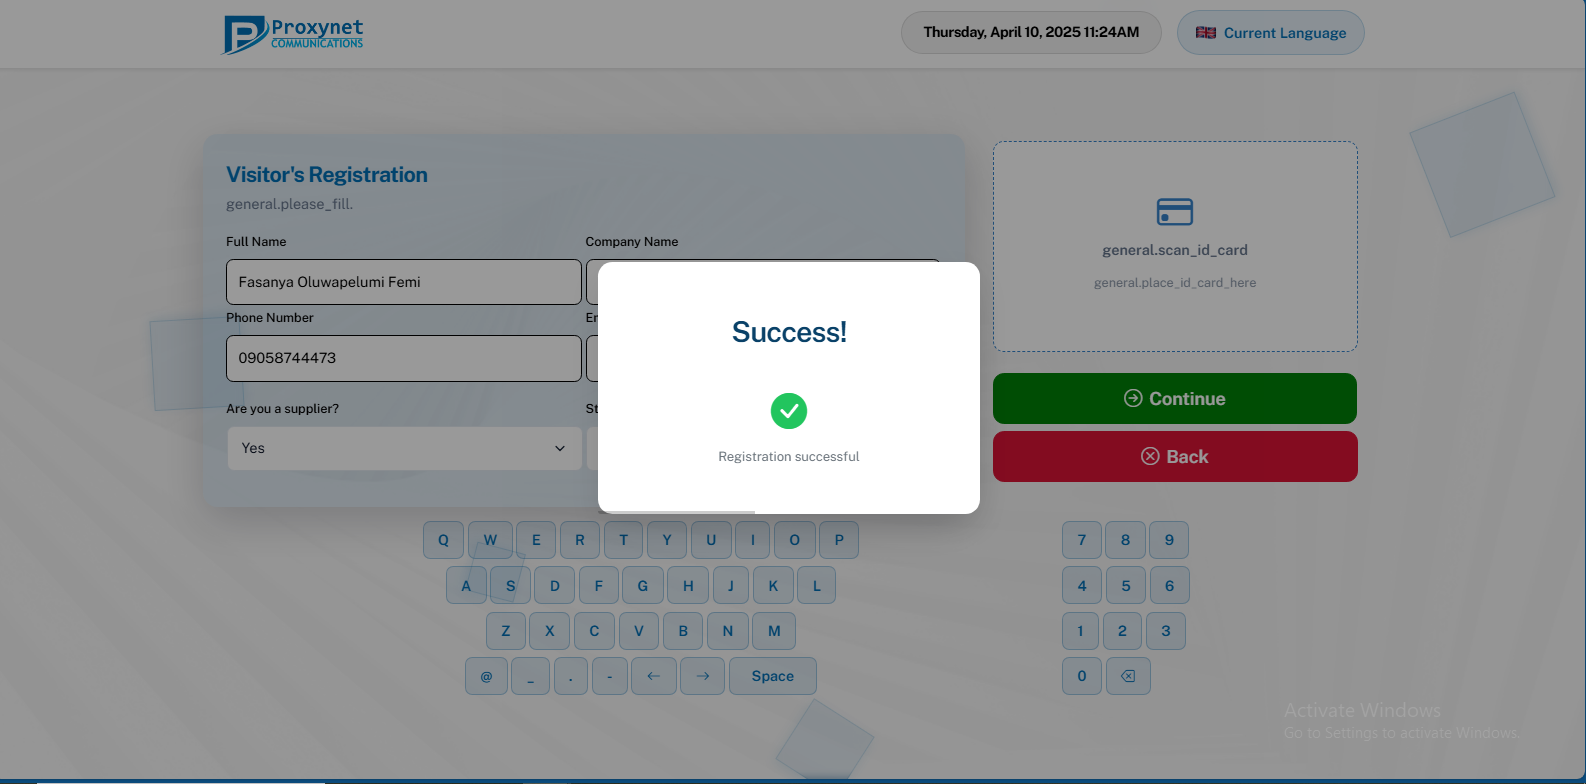
Once you are done with the Visitor's Registration and you click Continue it will bring a pop-up message telling you Registration successful just as shown in the image below
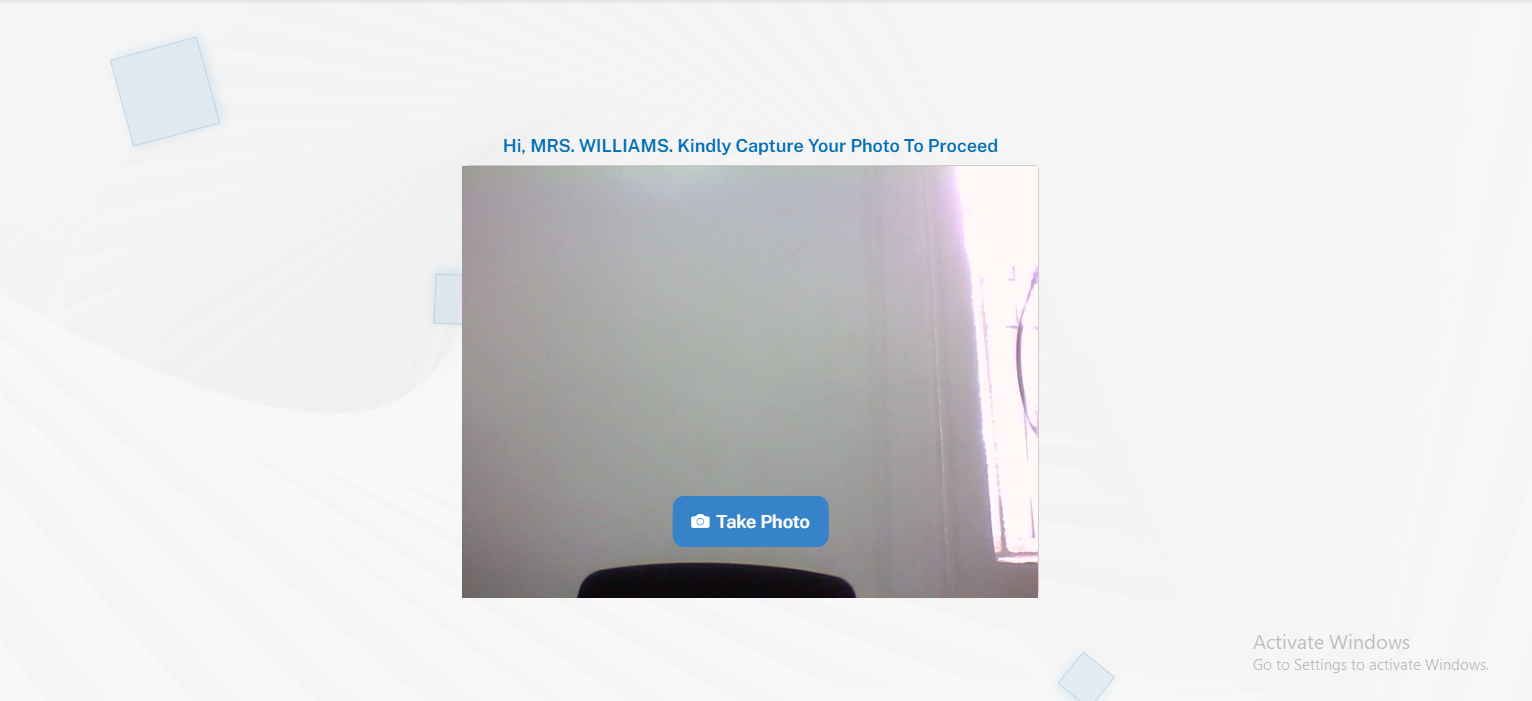
The next stage is the capturing Stage. The capturing section takes photo of the visitor, it will display a message Hi, MRS. WILLIAMS. Kindly Capture Your Photo To Procee then you will click on Take Photo. This is how it will look like in the image below
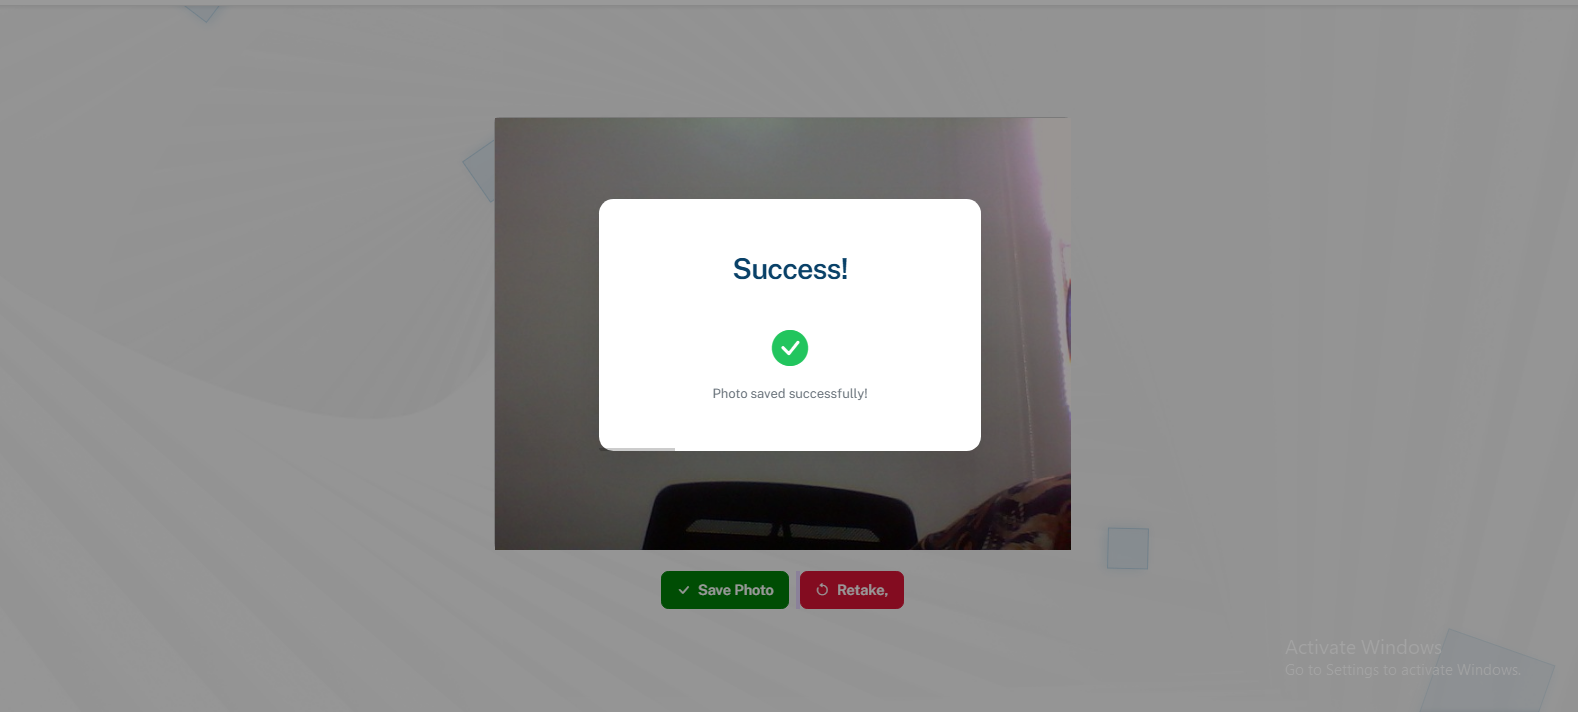
After you clicked on Take Photo, it brings up a pop-up message showing image saved successfully. This is what it will look like in the image below
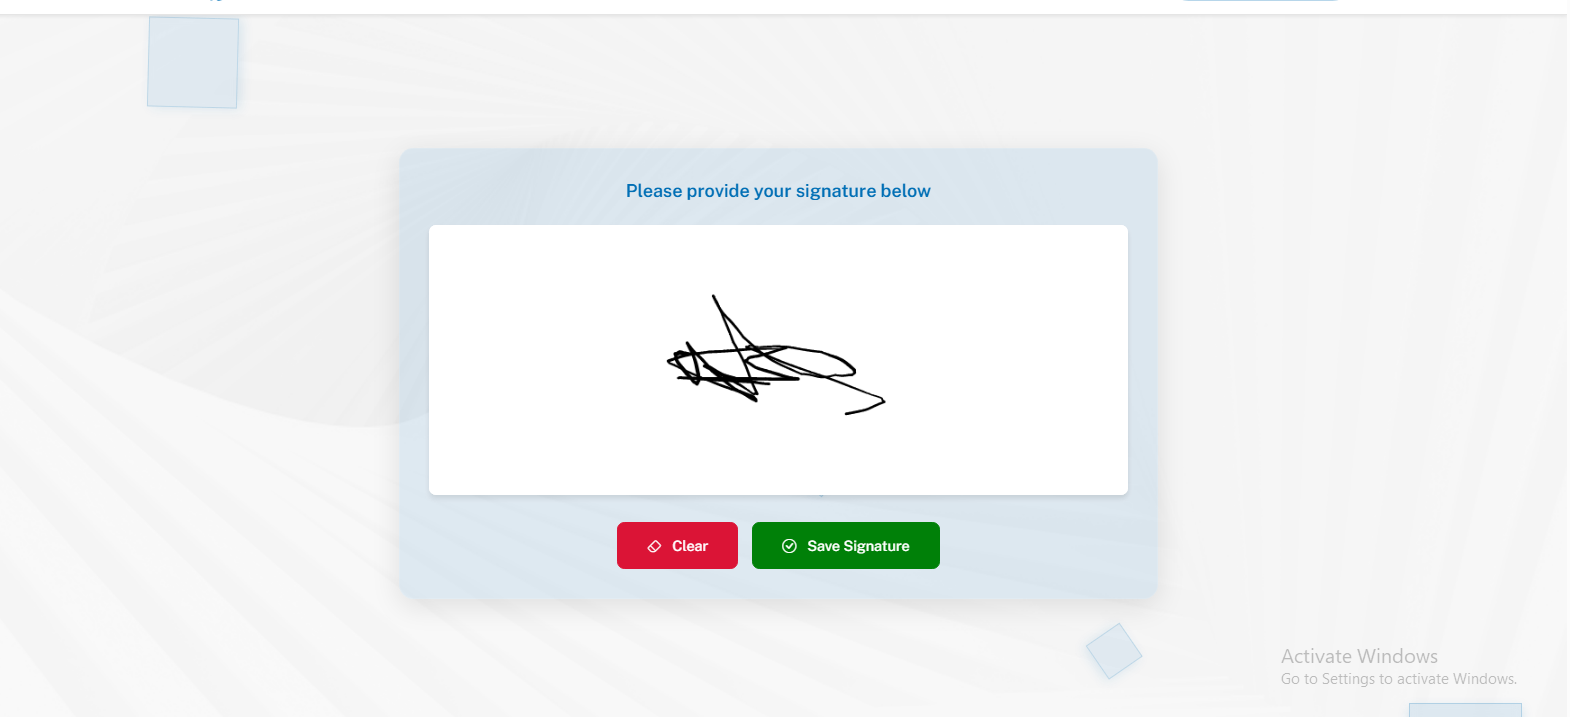
The next stage is to provide yours signature,so it will display a message above Please provide your signature below. When you have provided your signature you can either clear or save signature. This is what it will look like in the image below
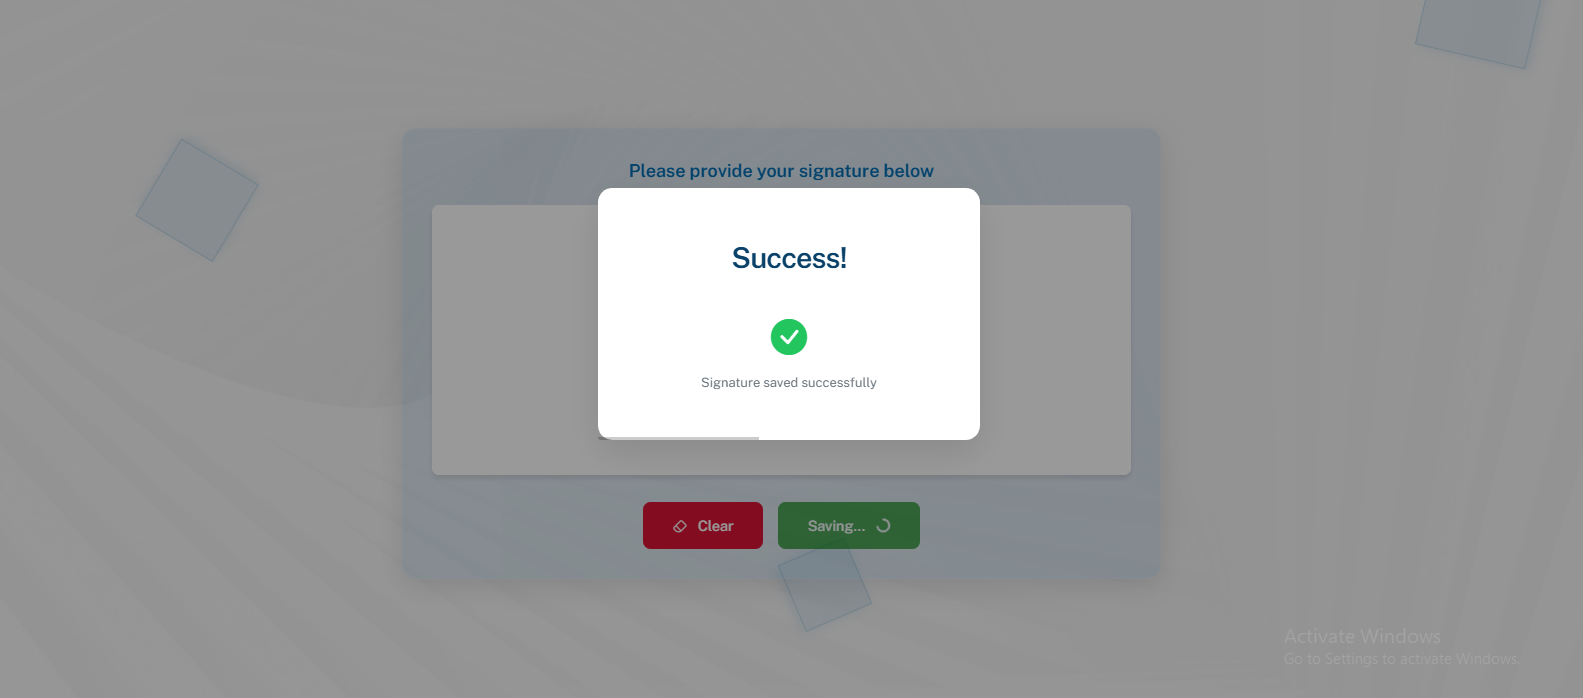
After you clicked on Save Signature, it brings up a pop-up message showing signature saved successfully. This is what it will look like in the image below
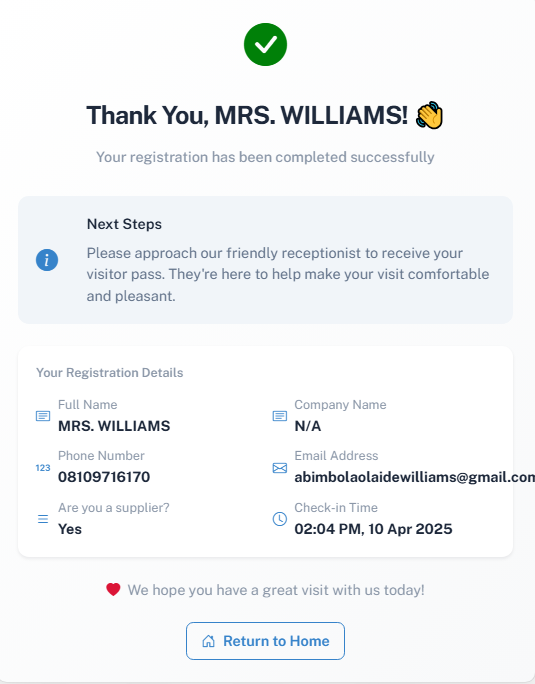
The final step for Visitor's Registration shows a Thank you message telling you Your registration has been completed successfully and showing you Your Registration Details. This is what it will look like in the image below
Note to aviod all this step as a visitor that has signed in before you have sign in with a passcode that will be given to you by the person you waant to visit
Contractors
To proceed as a Contractors you will click on the Contractor's button in the login/Sign in page

Once you have selected the Contractors option on the Login/Sign-in page, the system will redirect you to Contractor's Registration where you can enter your details to complete the check-in process. The image below displays the layout of this page
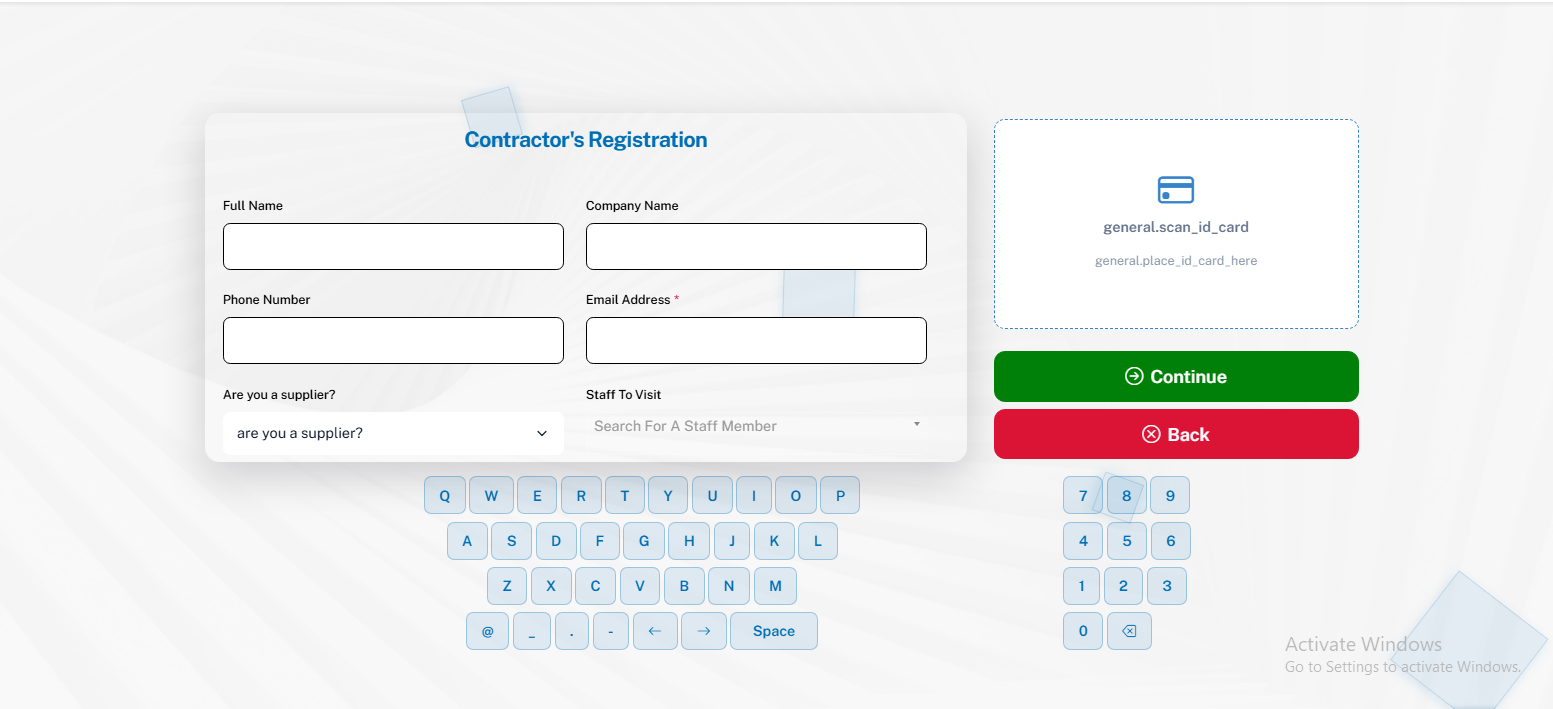
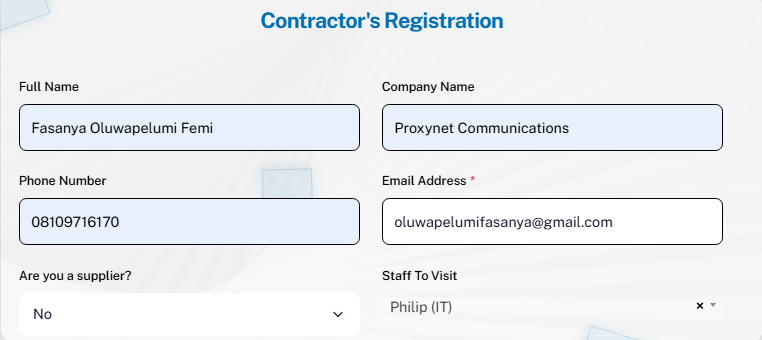
The Contractor's Registration section allows Contractor's to register the following details: Full name, Company Name, Phone Number, and Email Address. In this section you can also state if you are a supplier or not and choose the staff you want to visit. This is an example of a filled Contractor registeration in the image below
The final step of the registeration is to scan your ID Card. This is how the ID Card section will look like in the image below
To ensure accessibility across all device types, an on-screen keyboard is provided for users whose devices may not support physical input. The example below shows the layout of the on-screen keyboard as it appears during registration
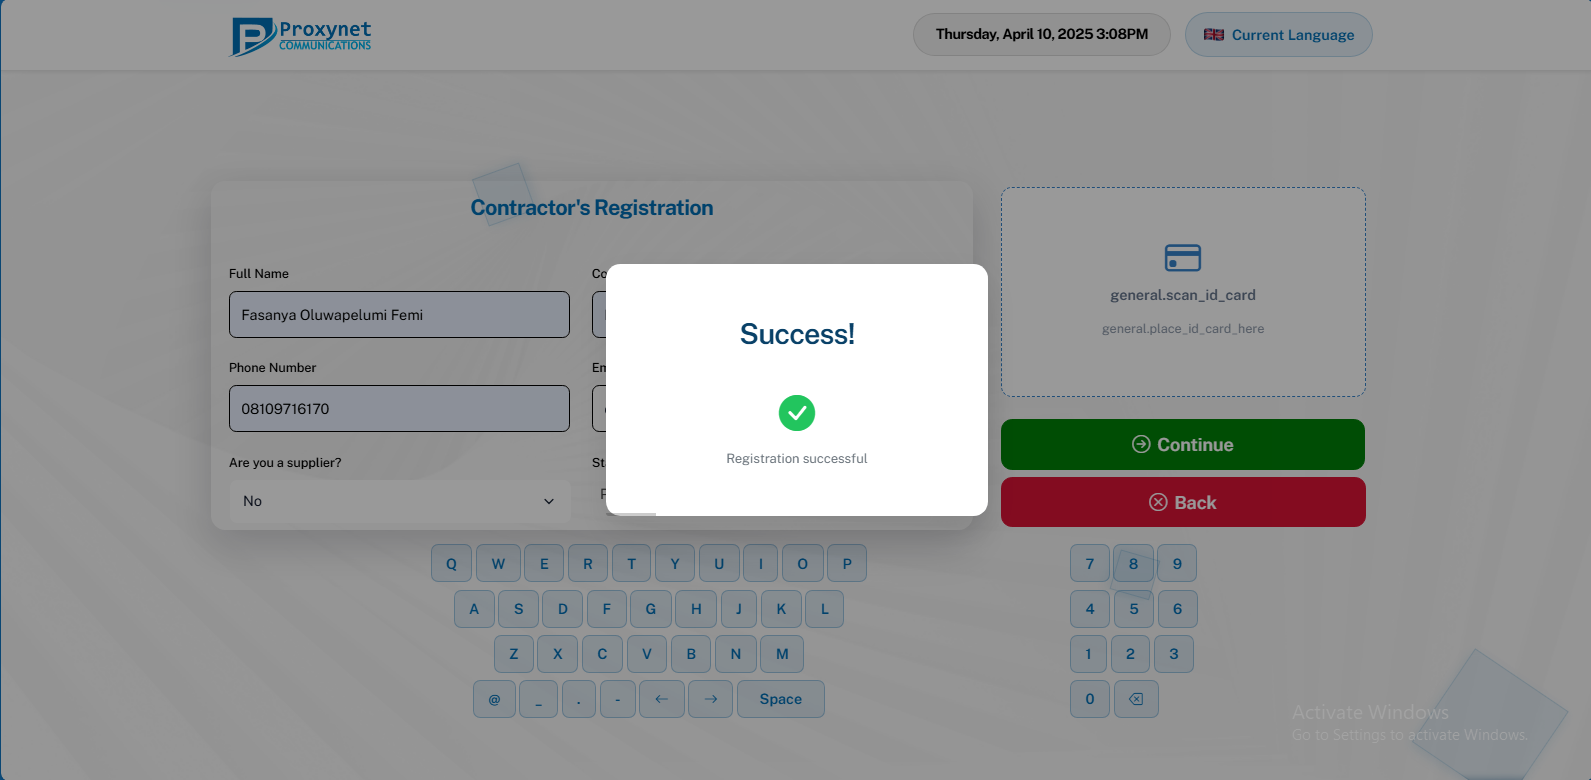
Once you are done with the Contractor's Registration and you click Continue it will bring a pop-up message telling you Registration successful just as shown in the image below
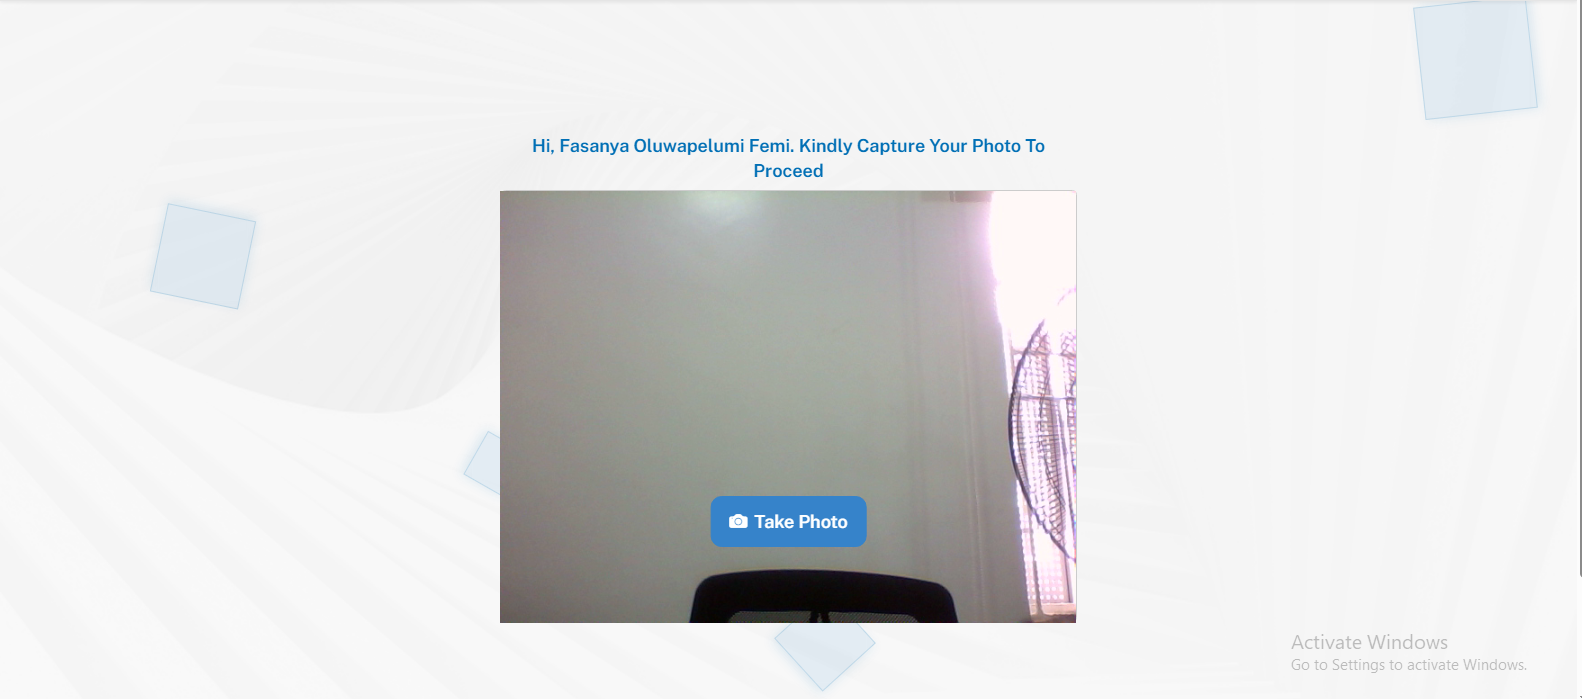
The next stage is the capturing Stage. The capturing section takes photo of the Contractor, it will display a message Hi, Fasanya Oluwapelumi Femi. Kindly Capture Your Photo To Proceed then you will click on Take Photo. This is how it will look like in the image below
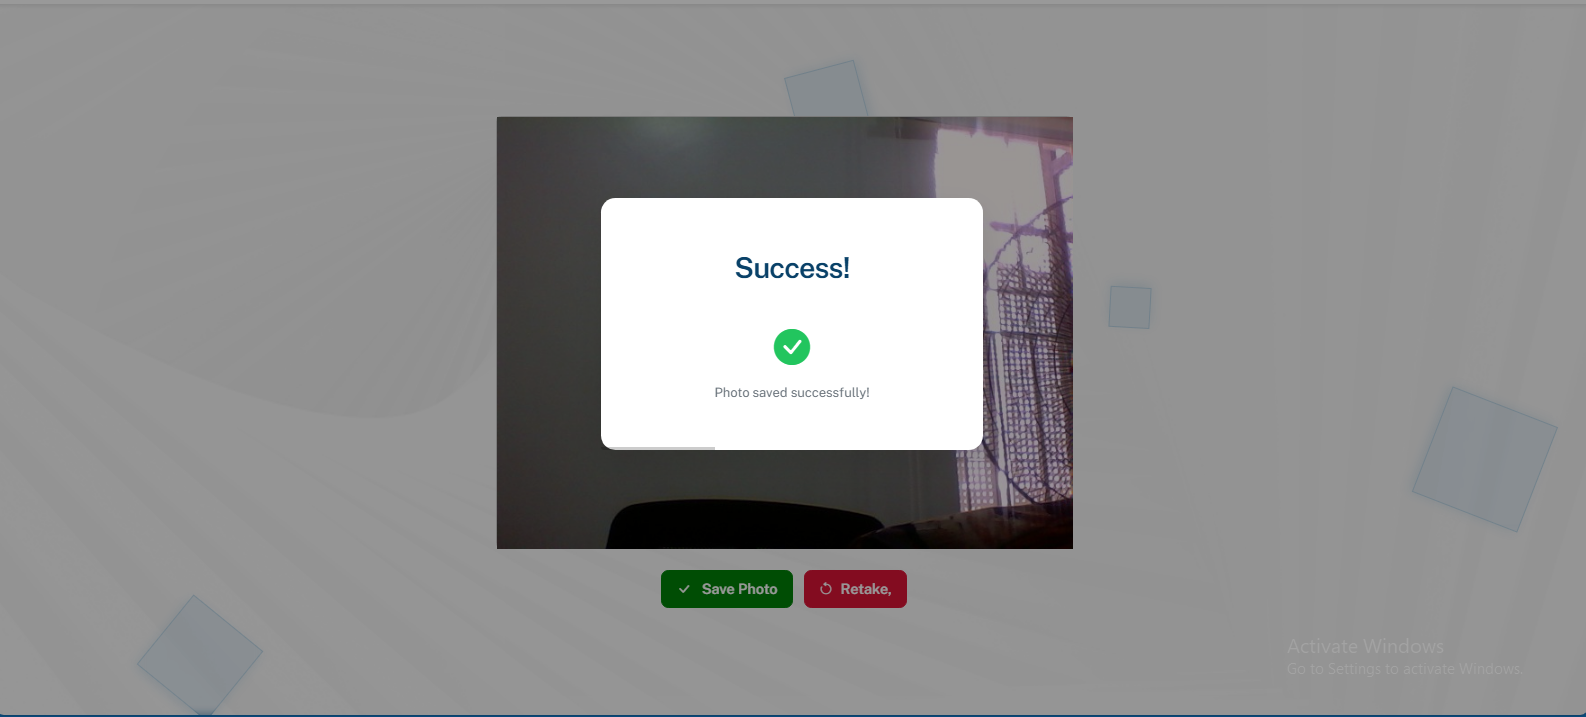
After you clicked on Take Photo, it brings up a pop-up message showing image saved successfully. This is what it will look like in the image below
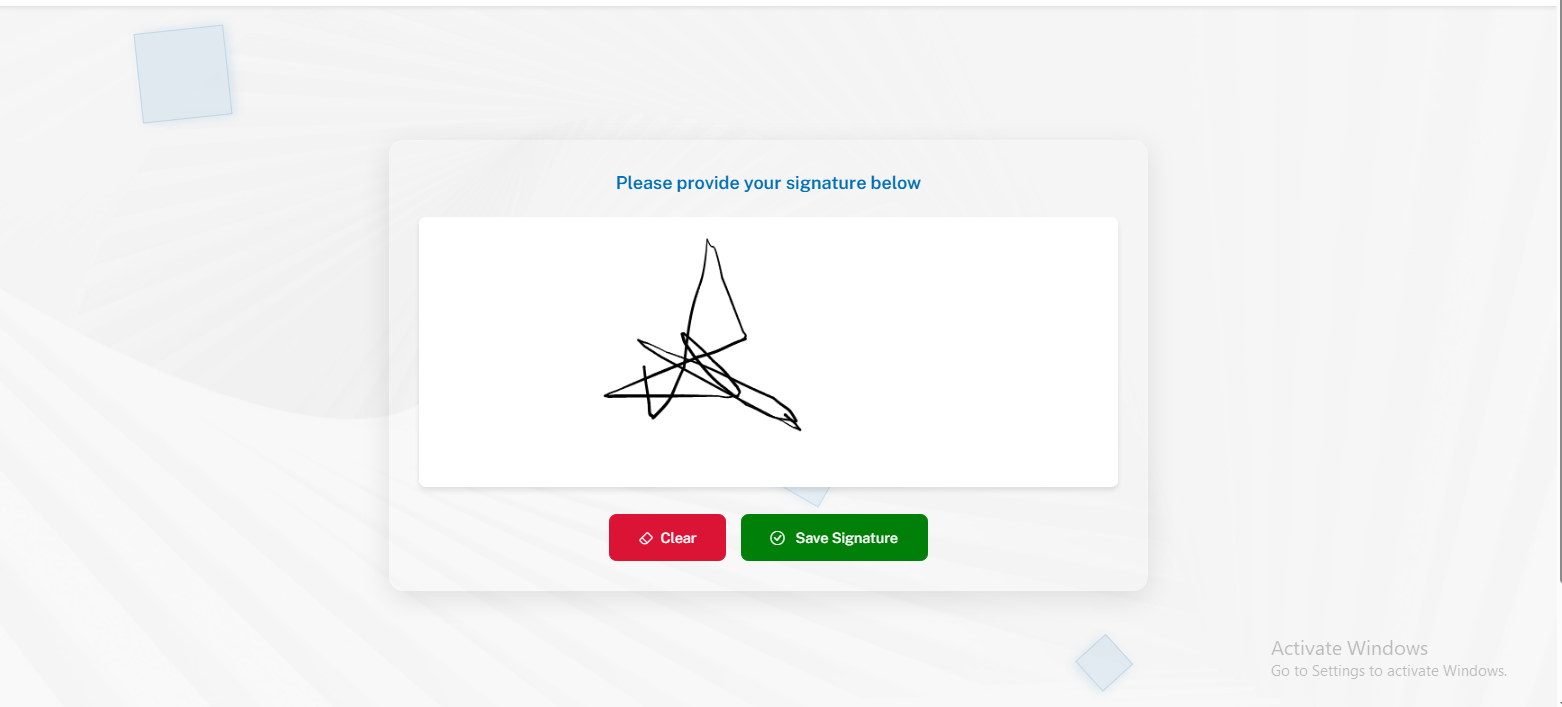
The next stage is to provide yours signature, so it will display a message above Please provide your signature below. When you have provided your signature you can either clear or save signature. This is what it will look like in the image below
After you clicked on Save Signature, it brings up a pop-up message showing signature saved successfully. This is what it will look like in the image below
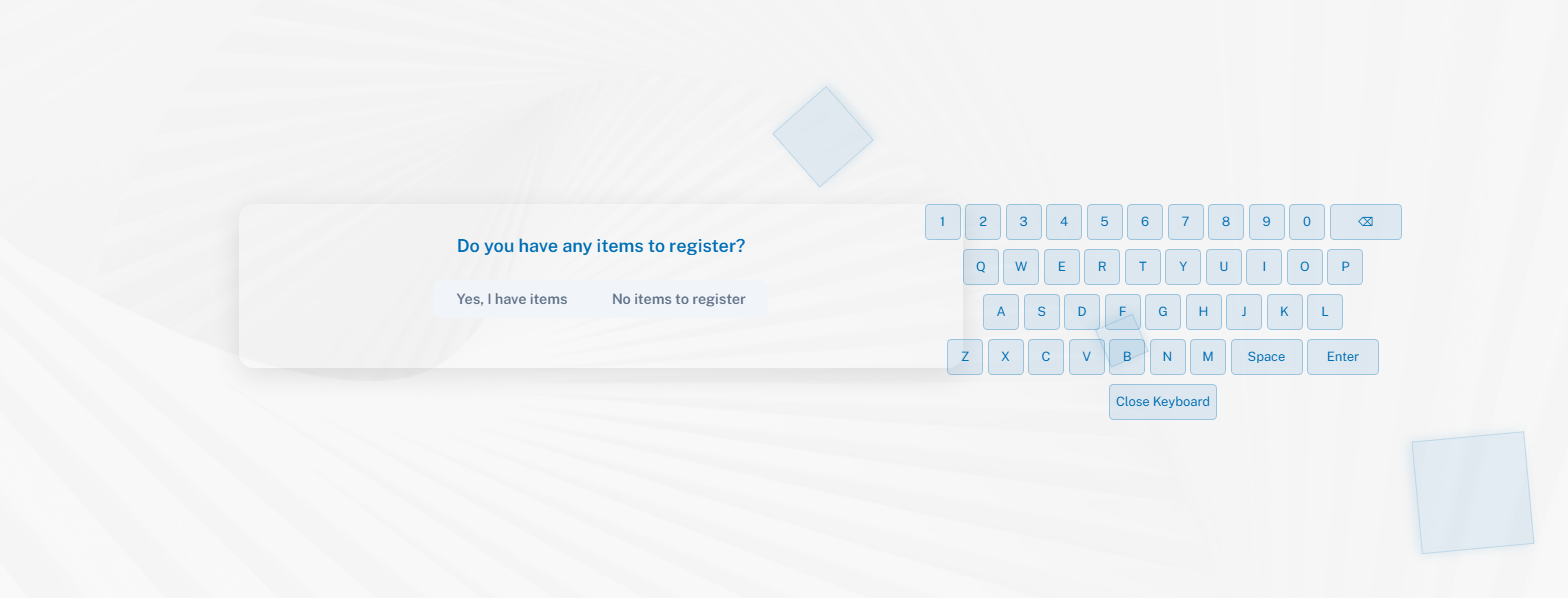
The next stage is to register items, the system will display a message asking if you have any items to register?, and under the message there are two Button that says Yes i have items and No items to register. This is how it will look like in the image below
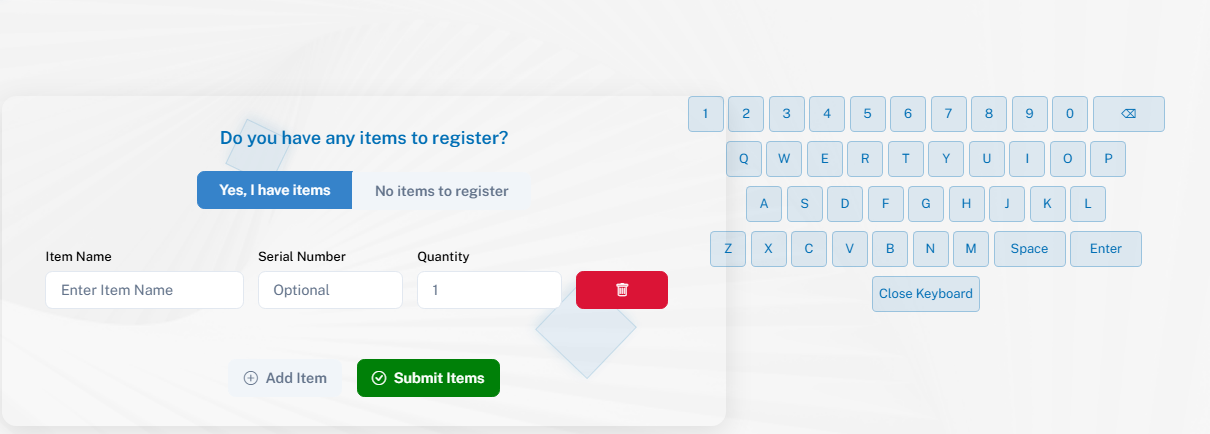
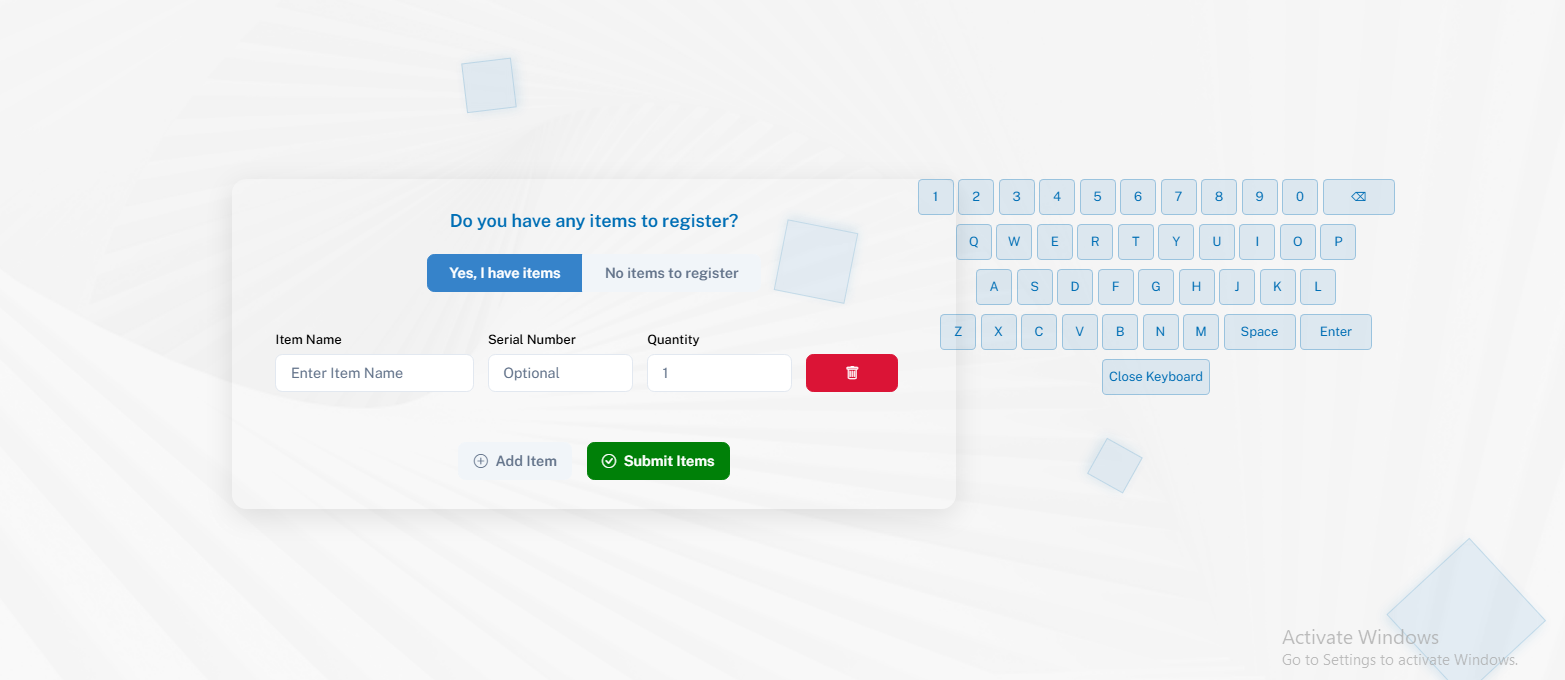
If you click the Yes, I have item button, you will fill a form that shows the Item Name, Serial Number, and Quantity also you can Add new item, and Delete Item then youm Submit Item. This is how it will look like in the image below
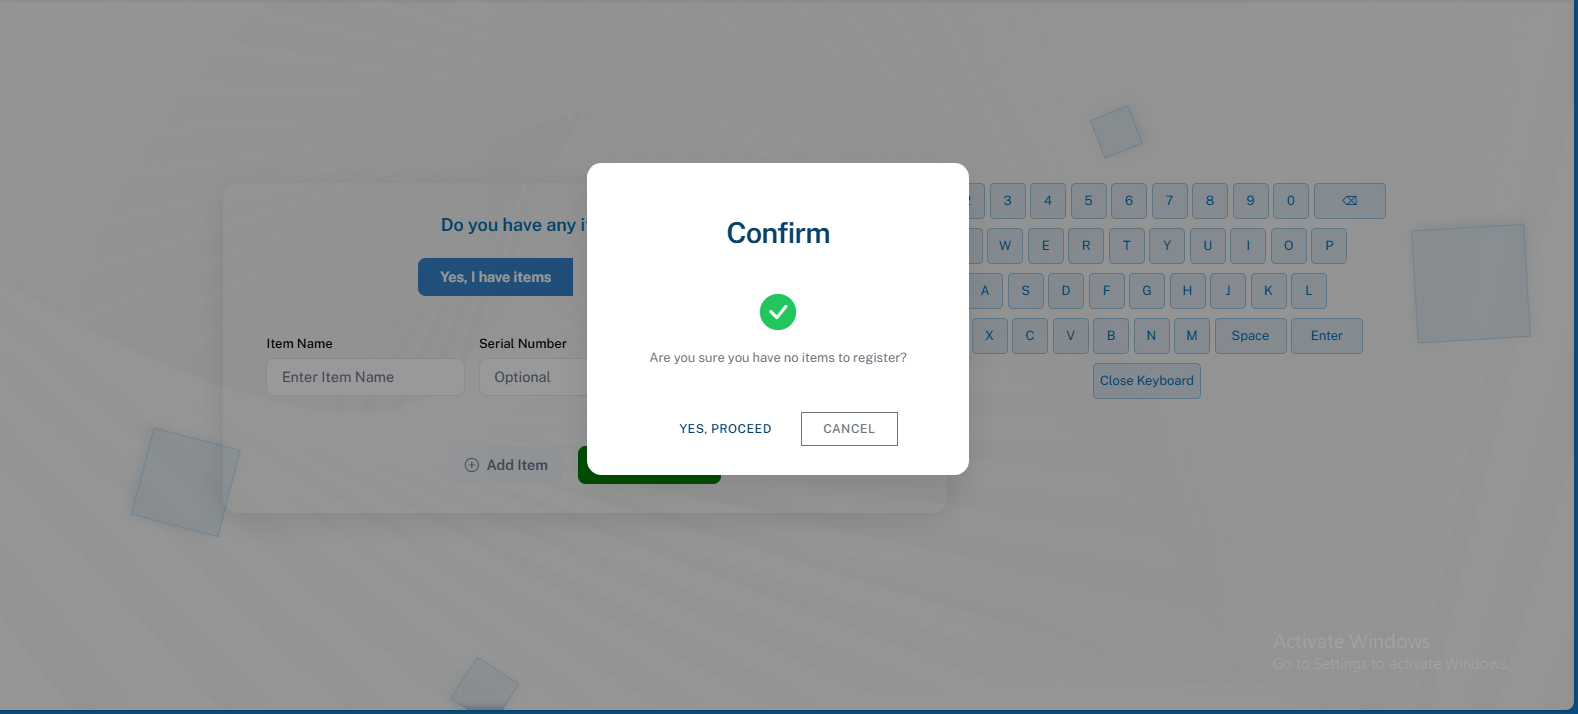
If you click No items to register button, it will display a Confirm message asking Are you sure you have no items to register?, if you don't have item you can click on the Yes, Procced button or you Cancel if you have Items. This is how it will look like
The final step for Contractor's Registration shows a Thank you message telling you Your registration has been completed successfully and showing you Your Registration Details. This is what it will look like in the image below
Note the Visitor and Contractor has similar registration format the difference is that for Contractor'sthey have to register their items